Valleytech Custom Solutions
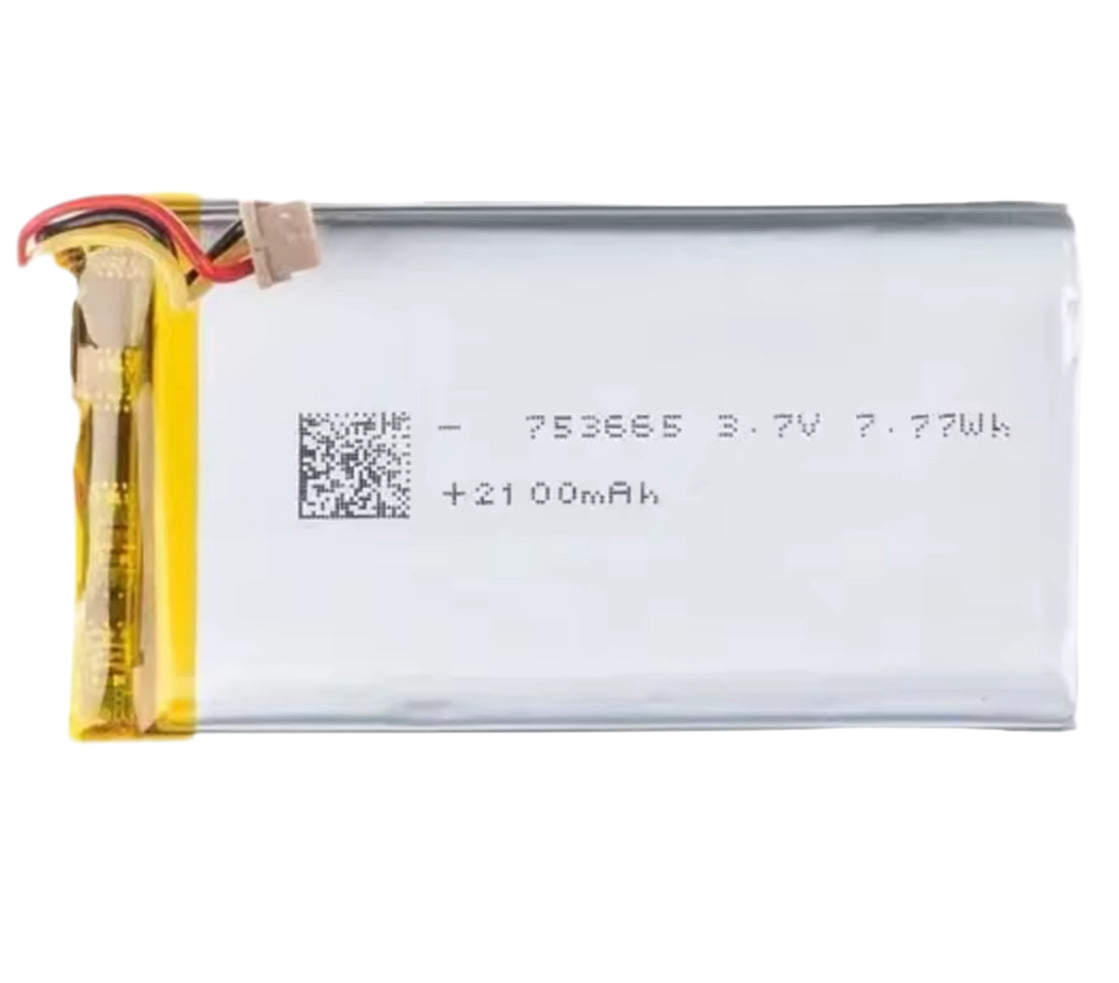
Flipper Zero Replacement Battery
Flipper Zero Replacement Battery
Couldn't load pickup availability
WILL SHIP WITHIN 24 HOURS OF PURCHASE
We are not responsible for any damages made while disassembling your flipper zero.
you must also download the calibration app on your flipper zero and follow the necessary directions to properly calibrate your battery.
To make things easier you can use rabbit-labs gauge tool and their steps listed to gauge the battery as well.
Installation Steps to Follow:
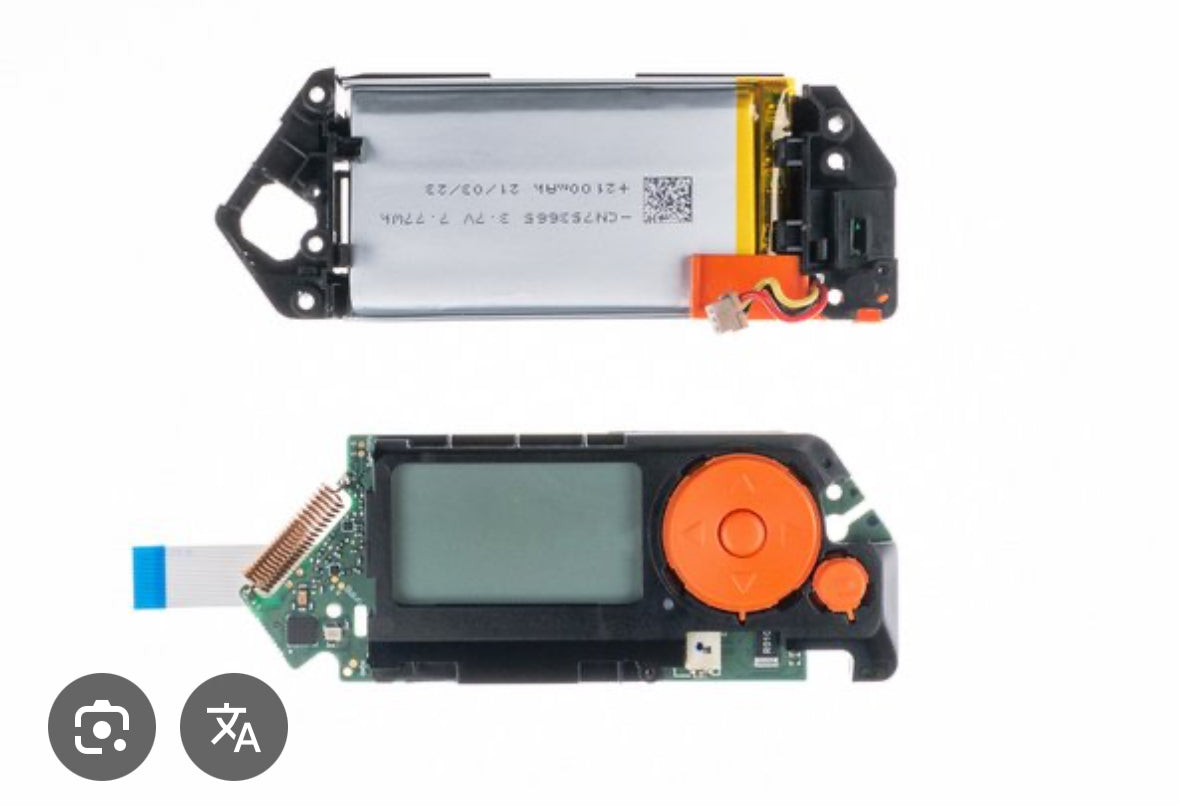
1.) Carefully dismantle your flipper – Be careful not to break your iButton pins, and be careful not to tear any ribbon cables!
2.) Unplug the battery from the PCB and remove the black plastic battery holder from the rest of the flipper. Note how the power cable is routed THROUGH the small opening near the SD Card slot.
3.) CAREFULLY remove the existing battery. It is held on using TWO small strips of double-stick adhesive tape. it is crucial you avoid puncturing the battery, so do not use any sharp tools, or metal tools. Use a plastic spudger if you have one, or a guitar pick and CAREFULLY pry it apart from the plastic as to not crack the plastic either. (WE ARE NOT RESPONSIBLE FOR IMPROPER REMOVAL OF THE ORIGINAL BATTERY! YOU HAVE BEEN WARNED). Please take note which way the wire is run, and how it is currently is inserted, you will want to make sure that the wire side is tucked UNDER the little clips when re-inserting the replacement battery.
4.) Install the replacement battery and make sure it is pressed down flush, you’ll have to install it under the small plastic clips as to prevent them from pressing into the edge of the battery. Be very careful at this step!
5.) the hard part is done! go ahead and re-route your cable, and press it firmly back into your flipper’s main board. again the cable sits nicely right along that slit near the SD card slot. Make sure not to pinch the wires, and make sure the connector is being pressed into the connector the right direction! If you reverse polarity of the connector, irreversible damage to your flipper will occur!
6.) Carefully re-assemble your flipper.
7.) Install the GAUGE TOOL using the link below. you will need to compile it using FBT and place it on your flipper. They are working on making a .FAP file available for easier use (WORK IN PROGRESS)
8.) Open the GAUGE TOOL and select “UNSEAL” using the Left arrow. wait for it to unseal, and then go ahead and charge your flipper to 100%.
9.) Once the flipper hits 100%. Open the GAUGE TOOL and Select “RESET” (right arrow) and plug the flipper back in and allow it to charge back to 100%… (it will likely drop to 95% after reset)
10.) Once it hits 100%, make sure to re-open the GAUGE TOOL and select the center button “FULL”. this will mark the battery as “full” and record the state of charge so that it is now calibrated.
You may need to try the above calibration steps (7 through 10) after a few charge cycles for best results.
A BRAND NEW replacement battery for the Flipper Zero.
Please ONLY CHOOSE GROUND SHIPPING THROUGH USPS!
We thank you for your patience!
this is the link to the git for the gauge tool, and give this man a star because honestly none of this would work without him.
https://github.com/tehrabbitt/flipperzero_gauge_tool
Share